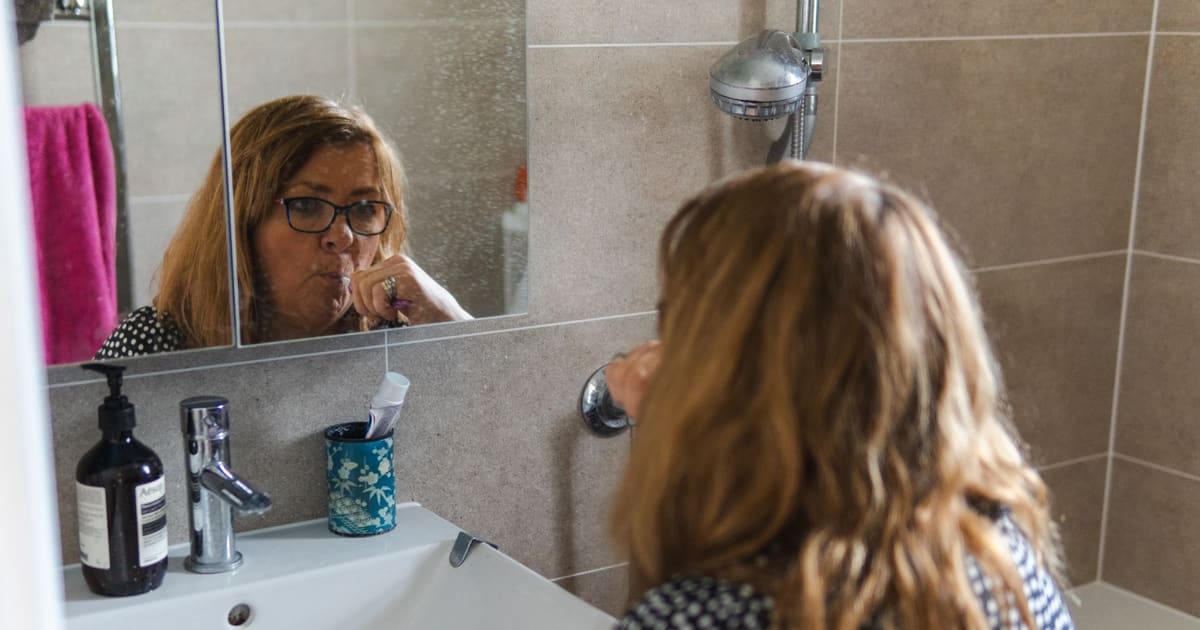
To floss correctly, cut about 18 inches of floss and wind most of it around your middle fingers, leaving a short working section. Guide that section gently between teeth using your thumbs and index fingers, curve it into a C-shape against each tooth, slide it just below the gumline, and move it up and down against the tooth surface. Use a fresh section of floss as you move to each new contact point.
Note
This guide provides general educational information about interdental cleaning. It is not a diagnosis, treatment recommendation, or substitute for professional dental or medical advice. Every patient's anatomy and oral-health situation is different -- for a personalized flossing demonstration, ask your dentist or hygienist at your next visit. Always consult a licensed dental professional before changing your oral hygiene routine if you have implants, crowns, bridges, braces, or gum disease.
Why Cleaning Between Teeth Matters
A toothbrush cleans the visible surfaces of your teeth -- the fronts, backs, and chewing edges. What it cannot reach are the contact points where neighboring teeth press together and the narrow space just below the gumline between them. The American Dental Association (ADA) notes that interdental cleaning removes plaque and food debris from these areas that a toothbrush simply cannot access.
Plaque -- the soft, sticky film of bacteria that forms on teeth -- is the underlying cause of both tooth decay and gum disease. When plaque sits undisturbed at contact points and below the gumline, the bacteria in it produce acids that erode enamel and irritate gum tissue. The CDC identifies poor oral hygiene, including inadequate interdental cleaning, as a primary risk factor for periodontal (gum) disease, which affects nearly half of adults over thirty in the United States, according to CDC surveillance data.
Daily interdental cleaning is not a luxury or a nice-to-have. The ADA recommends cleaning between teeth once a day as a core component of home oral care, alongside twice-daily brushing with a fluoride toothpaste. For more on preventing the cavities that missed plaque can cause, see How to Prevent Cavities: Evidence-Based Tips.
Step-by-Step Flossing Technique
The technique below describes traditional string floss. Variations for picks and water flossers appear in later sections.
Step 1 -- Measure and Wind
Break off about 18 inches of floss. Wind most of it around the middle finger of one hand and a small amount around the middle finger of the other hand. The middle fingers hold the supply; your thumbs and index fingers do the guiding. This arrangement keeps your index fingers free for precise control and lets you advance to a clean section easily.
Step 2 -- Pinch and Position
Pinch the floss between your thumb and index finger on each hand, leaving about one inch of working floss between them. Too much slack makes the floss hard to control; too little makes it difficult to curve around teeth.
Step 3 -- Slide Gently Between Teeth
Guide the floss between two teeth using a gentle zigzag motion -- not a snapping or sawing action. The contact point between teeth is tight; forcing the floss down in a straight line can snap it into the gum tissue and cause unnecessary soreness or injury.
Step 4 -- Form the C-Shape
Once the floss passes the contact point, curve it into a C-shape against one of the two neighboring teeth. This is the most important part of the technique. The C-shape hugs the curved surface of the tooth, letting you clean along the side of the tooth rather than just running floss straight down.
Tip
When you form the C-shape, think about wrapping the floss around the tooth like a seat belt -- it should conform to the curved surface of the tooth, not cut straight across the gap.
Step 5 -- Clean Below the Gumline
Gently slide the floss below the gumline until you feel a little resistance -- not pain. The gum tissue forms a shallow sulcus (pocket) around each tooth; this is where bacteria accumulate. Move the floss up and down two or three times against the tooth surface to clear debris from this area. Do not force it deeper if you feel significant resistance.
Step 6 -- Repeat on the Adjacent Tooth
Without removing the floss from the space, curve it into a C-shape against the neighboring tooth and repeat the up-and-down motion. Two teeth share every contact point; clean both sides before moving on.
Step 7 -- Advance to a Fresh Section
Wind the used portion of floss onto the finger that started with the smaller amount, exposing a clean section. Using a dirty section transfers bacteria from one contact point to the next rather than removing it.
Step 8 -- Work Around the Mouth
Continue tooth by tooth. Do not forget the back surface of the last molars on each side -- these are among the most cavity-prone areas on the tooth surface, and they are easy to skip.
Common Flossing Mistakes
Knowing what not to do matters as much as knowing what to do. These are the errors most likely to make flossing less effective -- or to cause soreness that makes people give up.
Snapping the floss into the gums. Forcing floss downward in a single sharp motion can cut or bruise the gum tissue. Always ease the floss through the contact point with a gentle zigzag movement.
Skipping the C-shape. Running the floss straight up and down without curving it against the tooth mainly cleans the contact point itself -- not the curved side surface of the tooth or the gumline area where plaque accumulates. The C-shape is where most of the cleaning work happens.
Using the same section for every tooth. Floss accumulates bacteria and debris as you work. Advancing to a fresh section at each gap ensures you are removing plaque rather than redistributing it.
Skipping the back teeth. Rear molars are harder to reach and easy to rush. They are also among the most common sites for cavities and gum disease, precisely because they are difficult to clean.
Quitting because of initial soreness or bleeding. Mild bleeding and tenderness during the first week or two of consistent flossing are common, particularly in people who floss infrequently. This is often a sign that gum tissue was already mildly inflamed from plaque buildup, not that flossing itself is causing harm. Most patients find that consistent daily flossing resolves this within a couple of weeks.
Warning
If your gums bleed every time you floss and the bleeding has not improved after two weeks of daily flossing, that may be a sign of gum disease or another underlying condition. Talk to your dentist -- persistent bleeding is worth investigating, and early gum disease responds well to professional treatment. If you notice sensitivity or discomfort while flossing, see How to Reduce Tooth Sensitivity for more context, and bring it up at your next dental visit.
Choosing the Right Floss Type
Different floss products suit different people, tooth spacings, and situations. None is universally "best" -- the right choice depends on your own anatomy, dexterity, and preferences.
| Floss type | Best for | Notes and considerations |
|---|---|---|
| Waxed string floss | Tight contact points | The wax coating helps it slip through narrow gaps without shredding; slightly bulkier than unwaxed |
| Unwaxed string floss | Average spacing; preference for a thinner feel | May fray in tight contacts or on rough edges; some patients find it grips the tooth surface more actively |
| Dental tape | Wider gaps between teeth or larger interdental spaces | Flat, ribbon-like profile; covers more surface area per stroke |
| Floss picks / pre-threaded flossers | Limited dexterity; children; on-the-go use | Convenient but harder to form a true C-shape; may require more effort to clean below the gumline precisely |
| Water flosser | Braces, bridges, implants, dexterity challenges | Effective at flushing debris; ADA-accepted as an interdental cleaner; see section below |
Your dentist or hygienist can recommend a specific type based on your spacing, any restorations you have, and your dexterity. If you are unsure, this is a practical question to raise at your next visit -- see How Often Should You See a Dentist? for guidance on scheduling.
Water Flossers vs. String Floss
Water flossers -- also called oral irrigators -- use a pressurized stream of water to displace plaque and food debris from between teeth and below the gumline. The ADA has awarded its Seal of Acceptance to qualifying water flosser models, recognizing them as effective interdental cleaners. This means that for most people, a water flosser is not just a supplement to string floss -- it is a clinically recognized alternative.
The evidence base for water flossers is strongest for patients who have difficulty using string floss because of limited dexterity, who wear fixed orthodontic appliances, or who have dental implants, bridges, or crowns where threading floss is cumbersome. For these patients, a water flosser may actually be easier to use consistently and thoroughly.
For patients with typical spacing and no restorations, both string floss and a water flosser are reasonable choices. The most important variable is consistency: an interdental cleaning method you use every day is more effective than a method you use occasionally.
This is a decision your dentist or hygienist can help you make based on your specific oral anatomy and health history.
How Often to Floss -- and When
The ADA recommends cleaning between your teeth once a day. The timing within the day is flexible. Some patients prefer to floss before bed so that plaque accumulated during the day does not sit against the teeth overnight. Others floss in the morning or after a main meal. The ADA does not specify a required time of day; consistency matters more than timing.
Brushing and flossing order. A study published in the Journal of Periodontology found that flossing before brushing and then brushing with a fluoride toothpaste resulted in higher interproximal fluoride concentrations compared with brushing first. The proposed mechanism is that flossing opens the interdental spaces, allowing fluoride from the toothpaste to reach them more readily. However, the ADA states that either order -- floss first or brush first -- is acceptable. If you currently brush before you floss and you do it consistently, there is no urgent reason to change.
Key takeaway
Once a day, every day, with good C-shape technique is the standard the ADA recommends. Sporadic thorough flossing is less effective than consistent daily flossing, even if individual sessions are brief.
Flossing for Kids and People with Braces
Children. The ADA recommends beginning to floss a child's teeth as soon as two adjacent teeth touch -- typically between ages two and six, depending on the child's development. Until around age ten to twelve, most children lack the fine motor coordination to floss independently and need a parent or caregiver to help. Floss picks or pre-threaded flossers can reduce the dexterity demands and make the process more manageable for children who are beginning to floss on their own.
Braces. Traditional fixed braces create multiple additional surfaces that trap plaque, including the brackets and wires themselves. Standard floss can still be used by threading it under the archwire at each contact point -- a floss threader (a small, flexible loop tool) makes this easier. Water flossers are widely used by orthodontic patients because the pressurized stream can reach around brackets and wires without threading. Interdental brushes (small, cone-shaped brushes sized for the spaces around brackets) are another option your orthodontist may suggest. Your orthodontist and general dentist can demonstrate the approach that works best for your specific appliance.
Implants, bridges, and crowns. Flossing around dental implants and under fixed bridges requires accessing areas that differ from natural teeth. Your dentist or periodontist will typically demonstrate the specific technique recommended for your restorations at the time of placement.
Tip
If you find regular flossing difficult because of arthritis, limited hand mobility, or other dexterity challenges, tell your dentist. There are tools -- floss holders, pre-threaded flossers, electric water flossers, and interproximal brushes -- designed specifically to reduce the hand and wrist demands of interdental cleaning. Your hygienist can give you a hands-on demonstration of whichever option fits your situation best.
Putting It All Together
Correct flossing technique comes down to a few consistent actions: enough floss to work with a fresh section at every gap, a C-shape that conforms to the curve of each tooth, gentle movement below the gumline rather than a hard snap, and coverage of every contact point including the backs of the last molars. The ADA's once-a-day recommendation applies regardless of which tool you use -- string floss, dental tape, a pick, or a water flosser.
Mild initial soreness and brief bleeding during the first week or two are common and usually resolve with consistent practice. Bleeding that persists beyond two weeks, or gum sensitivity that does not improve, warrants a conversation with your dentist. A professional cleaning and exam can identify whether gum disease, a rough restoration, or another factor is contributing.
For a broader picture of keeping your teeth healthy between visits, see How to Prevent Cavities: Evidence-Based Tips and How Often Should You See a Dentist?.
Your dentist or dental hygienist is the best resource for a personalized technique demonstration -- especially if your situation involves braces, implants, crowns, bridges, limited dexterity, or any condition that makes standard flossing uncomfortable. A brief demonstration during a routine cleaning visit can clarify the right approach for your specific anatomy in a way that written guidance cannot fully replicate.
Frequently asked questions
How long should you floss each day?
The American Dental Association recommends cleaning between your teeth once a day. The actual time varies by how many teeth you have and how carefully you work, but most people need one to three minutes to floss all contact points thoroughly. Speed matters less than consistency and technique.
Is it normal for gums to bleed when you start flossing?
Some mild bleeding during the first week or two of regular flossing is common, particularly if you have not flossed consistently. The American Dental Association notes that inflamed gums often settle down once plaque is removed daily. Bleeding that persists beyond two weeks warrants a conversation with your dentist.
Does it matter whether you floss before or after brushing?
Research published in the Journal of Periodontology found that flossing before brushing allowed fluoride from toothpaste to reach between teeth more effectively. However, the American Dental Association states that either order is acceptable -- the most important factor is that you do both every day.
Can a water flosser replace string floss?
The American Dental Association accepts water flossers as effective interdental cleaners and has awarded its Seal of Acceptance to qualifying devices. For most people, water flossers are a clinically recognized alternative to string floss, not merely a supplement. Your dentist or hygienist can help you decide which method suits your anatomy and dexterity.
How should children learn to floss?
The American Dental Association recommends that parents begin flossing a child's teeth as soon as two teeth touch. Children typically lack the fine motor control for independent flossing until around age ten to twelve. Floss picks or pre-threaded flossers can make the process easier for smaller hands.